Easy Amigurumi Snowman: Free Crochet Pattern for Beginners
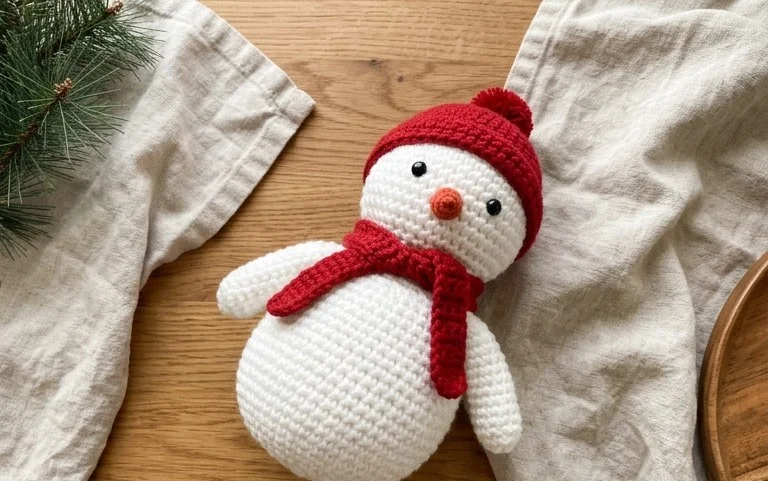
This tiny snowman stands about three inches tall with a dense, squishy texture that makes it hold its shape perfectly on a shelf or mantle. It is a wonderful project for those learning to crochet because it uses basic single crochet stitches in continuous rounds. You will finish the head and body separately and then join them to create a charming winter friend for your home. You gain confidence in your tension and stitch counting with every turn of the hook. This pattern is a reliable way to practice your magic ring skills while crafting a thoughtful, handmade gift for someone special during the colder months.
Why You’ll Love This Pattern
This beginner-friendly crochet sphere pattern provides the perfect foundation for learning amigurumi, as it relies entirely on single crochet stitches worked in a continuous spiral. You can whip up these spheres in under an hour, making them excellent projects for using up leftover yarn scraps from larger blankets or garment projects. Because the construction is straightforward, it serves as a reliable base for creating diverse characters, ornaments, or even juggling balls by simply adjusting the final size. The repetitive nature of the increases and decreases offers a meditative experience, helping you master tension consistency without needing to track complex stitch patterns or color changes.
I finally learned how to close a sphere perfectly thanks to the clear instructions in this guide. It was the exact project I needed to stop feeling intimidated by magic rings.
— Sarah, amigurumi hobbyist
Pattern Overview & Skill Level
- Skill Level: Beginner
- Approximate Time: 45 minutes
- Construction: Continuous rounds worked in a spiral starting from a magic ring.
- Finished Dimensions: Approximately 3 inches in diameter when using worsted weight yarn and a 3.5 mm hook.
Materials & Supplies Needed
- Yarn: Worsted weight (#4) cotton or acrylic blend, approximately 30 yards.
- Hook Size: 3.5 mm (E-4) for a tight, dense fabric that prevents stuffing from showing through.
- Notions: Tapestry needle, stitch marker, fiberfill stuffing, and scissors.
- Yarn Substitutions: You may use DK weight yarn with a 3.0 mm hook for a smaller sphere, or bulky weight yarn with a 5.0 mm hook for a larger sphere, though you will need to adjust your stuffing amount accordingly.
Stitch Guide & Abbreviations (US Terms)
- MR: Magic ring
- ch: Chain
- sc: Single crochet
- inc: Increase (work 2 sc into the same stitch)
- dec: Decrease (sc2tog, inserting the hook into the front loops of the next two stitches only)
- st(s): Stitch(es)
- sl st: Slip stitch
- BLO: Back loop only
Step-by-Step Pattern Instructions
Sphere Body
Work in a continuous spiral. Use a stitch marker to keep track of the start of each round.
- Rnd 1: Start 6 sc in a magic ring (6 sts).
- Rnd 2: Inc in each st around (12 sts).
- Rnd 3: [Sc in next st, inc in next st] 6 times (18 sts).
- Rnd 4: [Sc in next 2 sts, inc in next st] 6 times (24 sts).
- Rnd 5: [Sc in next 3 sts, inc in next st] 6 times (30 sts).
- Rnd 6-10: Sc in each st around (30 sts).
- Rnd 11: [Sc in next 3 sts, dec] 6 times (24 sts).
- Rnd 12: [Sc in next 2 sts, dec] 6 times (18 sts).
- Rnd 13: [Sc in next st, dec] 6 times (12 sts). Begin stuffing the sphere firmly with fiberfill.
- Rnd 14: Dec 6 times (6 sts).
Finishing
Cut the yarn, leaving a 6-inch tail. Thread the tail onto a tapestry needle. Weave the yarn through the front loops of the remaining 6 stitches and pull tight to close the opening. Secure the end with a knot and bury the yarn tail inside the sphere.
Care & Washing Instructions
- Hand wash in cool water with a mild detergent to prevent the fiberfill from clumping.
- Lay the sphere flat on a clean towel and reshape it while damp to ensure it stays perfectly round.
- Do not wring or twist the item, as this can distort the internal stuffing and the structure of the stitches.
Pro Tips & Common Mistakes to Avoid
- Maintaining consistent tension is the most important factor in preventing holes where the stuffing might peek through. If you notice gaps, try going down a hook size.
- Always place a stitch marker in the very first stitch of every round. Working in a spiral makes it very easy to lose your place if you rely on counting visually.
- To hide your yarn tails, thread the needle and push it through the body of the sphere, exiting several stitches away. Pull firmly so the tail disappears inside before trimming the excess yarn.
- If you wish to make a larger sphere, continue the increase sequence (e.g., 4 sc, inc; 5 sc, inc) until you reach your desired diameter, but remember to maintain an equal number of rows without increases to create height before beginning your decreases.
Frequently Asked Questions
Can I use a different weight of yarn for this project?
Yes, you can use any weight of yarn, but ensure you pair it with a hook size slightly smaller than what is recommended on the yarn label to create a dense fabric that holds its shape and keeps the stuffing contained.
Is it okay to wash this in a machine?
Machine washing is not recommended for small stuffed items, as the agitation can cause the fiberfill to shift or bunch up, leading to a lumpy shape that is difficult to fix once dried.
How do I know if I have stuffed the sphere enough?
The sphere should feel firm to the touch, and the stitches should not be stretching apart. If you can see the white stuffing through your stitches, remove some fill or consider using a smaller hook for your next project.
Can I sell the spheres I make using this pattern?
Check the designer’s specific policy regarding finished items. Generally, if you are selling items made from a pattern, it is polite to credit the designer by linking back to the original source.
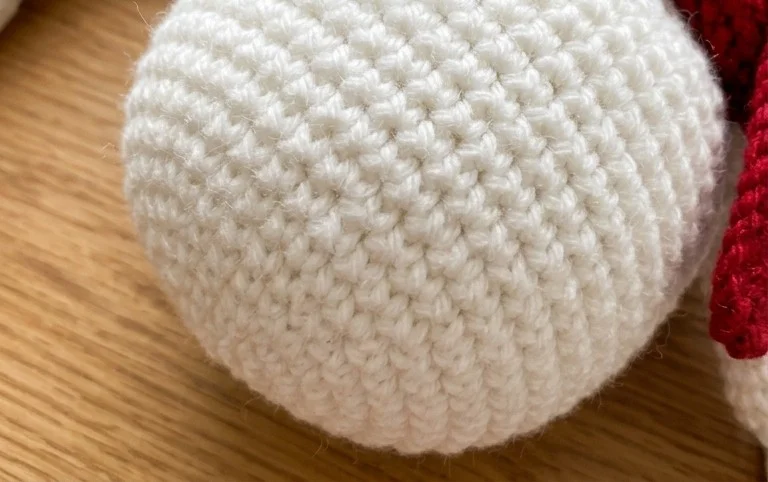
Your finished snowman looks charming with its neat stitches and round, firm shape. You can customize the look by using a velvet yarn for a fuzzy texture or adding a tiny scarf in a bright red wool to add a splash of color. Post a photo of your creation on social media to show your progress. Visit the archives on our blog to find more beginner patterns for animals and ornaments that help you build your skills one hook movement at a time.