Easy Granny Square Dishcloth: Free Crochet Pattern Guide
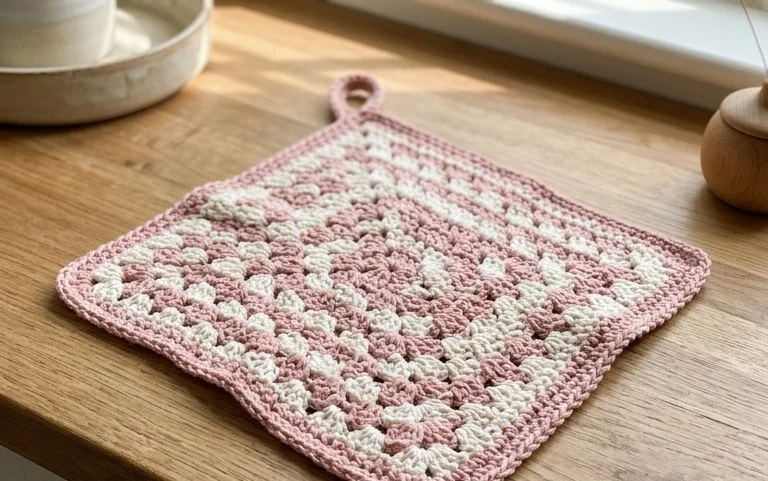
These cotton squares scrub heavy pans and rinse clean in seconds, feeling sturdy yet soft against your palms. Beginners find this project approachable because it relies on simple clusters rather than complex stitch counts. You will appreciate how the uniform weight adds texture to your kitchen while replacing disposable sponges with a reusable alternative. This article guides you through the rhythm of basic chain spaces and double crochet clusters, teaching you how to build a square that lies perfectly flat on your counter. These items make thoughtful housewarming gifts that prove useful every single day in the heart of your home.
Why You’ll Love This Pattern
The Classic Crochet Granny Square is the foundation of countless heirloom projects, from blankets to tote bags. You will appreciate how quickly each square works up once you memorize the rhythm of clusters and chain spaces. This pattern uses a traditional three-double-crochet cluster technique that creates a balanced, square shape without the curling often seen in less structural designs. Because it relies on basic stitches, you can complete a square in under twenty minutes, making it an ideal portable project for commutes or evening relaxation.
This pattern is remarkably consistent. I have made over fifty squares for a baby blanket, and every single one came out the exact same size because the instructions for the corner chains are so clear.
— Sarah, intermediate maker
Pattern Overview & Skill Level
- Skill Level: Beginner
- Approximate Time: 15-20 minutes per square
- Construction: Worked in joined rounds, starting from the center and moving outward.
- Finished Dimensions: 5 inches by 5 inches using worsted weight yarn.
Materials & Supplies Needed
- Yarn: Worsted weight (#4 medium), 100% acrylic or wool blend, approximately 15 yards per square.
- Hook Size: 5.0 mm (US H-8).
- Notions: Yarn needle for weaving ends, scissors, and a measuring tape to ensure gauge.
- Yarn Substitutions: You can use DK weight yarn for a smaller 4-inch square, or bulky weight yarn for a larger 7-inch square, though you will need to adjust your yardage accordingly. Acrylic is recommended for blankets due to durability, while wool offers more warmth and natural elasticity.
Stitch Guide & Abbreviations (US Terms)
- ch: chain
- st/sts: stitch/stitches
- sl st: slip stitch
- dc: double crochet
- dc-cluster: 3 double crochet stitches worked into the same space
- sp: space (the gap created by the chains)
- MR: magic ring (an adjustable loop to start)
Step-by-Step Pattern Instructions
Granny Square Body
- Rnd 1: Start with a MR. Ch 3 (counts as first dc). Work 2 dc into the ring. Ch 2, 3 dc into the ring. Ch 2, 3 dc into the ring. Ch 2, 3 dc into the ring. Ch 2, join with a sl st to the top of the initial ch 3. (12 dc, 4 ch-2 spaces)
- Rnd 2: Sl st into the next 2 sts and into the first ch-2 corner space. Ch 3, 2 dc, ch 2, 3 dc in same corner sp. Ch 1, (3 dc, ch 2, 3 dc) in the next corner sp. Repeat from * to * two more times. Ch 1, join with a sl st to the top of the initial ch 3. (24 dc, 4 ch-2 spaces, 4 ch-1 spaces)
- Rnd 3: Sl st into the next 2 sts and into the first ch-2 corner sp. Ch 3, 2 dc, ch 2, 3 dc in same corner sp. Ch 1, 3 dc in next ch-1 side sp, ch 1, (3 dc, ch 2, 3 dc) in next corner sp. Repeat from * to * two more times. Ch 1, 3 dc in last ch-1 sp, ch 1, join with a sl st to the top of the initial ch 3. (36 dc, 4 ch-2 spaces, 8 ch-1 spaces)
- Rnd 4: Sl st into the next 2 sts and into the first ch-2 corner sp. Ch 3, 2 dc, ch 2, 3 dc in same corner sp. Ch 1, [3 dc in next ch-1 sp, ch 1] across to next corner. (3 dc, ch 2, 3 dc) in corner. Repeat around. Join with a sl st to the top of the initial ch 3. (48 dc)
Finishing
Fasten off yarn leaving a 6-inch tail. Pull the tail through the final loop to secure. Use a yarn needle to weave the end through the back loops of the stitches on the reverse side of the square to hide the yarn. Repeat for the center starting tail.
Care & Washing Instructions
- Machine wash in cold water on a gentle cycle using mild detergent.
- Lay the square flat on a towel to air dry, reshaping it with your hands while damp.
- Do not iron or bleach, as this may damage the fiber structure and affect the drape of your finished project.
Pro Tips & Common Mistakes to Avoid
- Maintain consistent tension by ensuring your yarn feed is smooth; if you pull too tight on the chain stitches, the square will begin to cup inward rather than laying flat.
- Place a removable stitch marker in the top of the initial ch 3 of every round to make joining much easier and to prevent missing the final stitch of the round.
- Weave your ends in multiple directions, specifically back and forth through the base of the stitches, to ensure they do not pull out after the item has been washed several times.
- If you want to increase the size of the square, simply repeat the pattern of working (3 dc, ch 2, 3 dc) in the corners and (3 dc) in every side chain space until the desired size is reached; remember that each additional round consumes significantly more yarn.
Frequently Asked Questions
Can I use this pattern for a temperature blanket?
Yes, this square is perfect for temperature blankets because the size remains consistent regardless of the yarn color, allowing you to easily join them into a uniform grid.
Is this pattern suitable for complete beginners?
Absolutely, as it only requires knowledge of chains, double crochet stitches, and slip stitches, which are the fundamental building blocks of crochet.
How do I join these squares together?
You can join them using a mattress stitch for an invisible seam or a single crochet join for a raised, decorative ridge between the squares.
Can I sell the items I make from this pattern?
You are welcome to sell physical items made from this design, provided you credit the pattern and do not redistribute the instructions themselves.
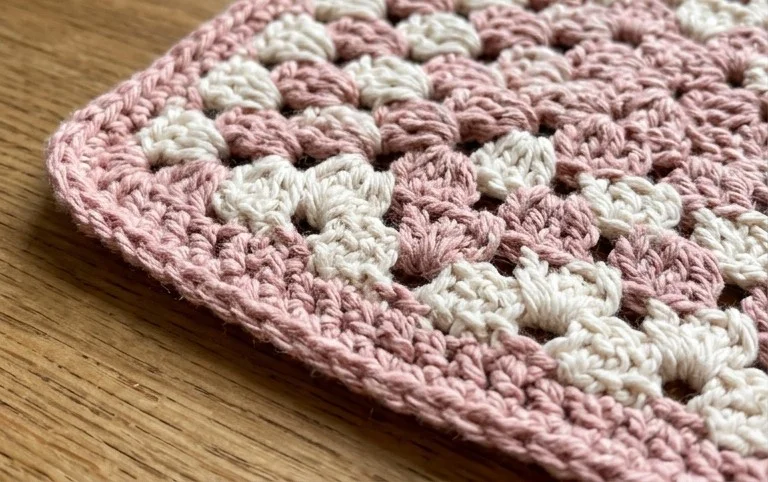
Your new hand-stitched cloth will soften further with each laundry cycle, becoming more absorbent and efficient at handling daily spills. You can experiment with variegated yarn to create shifting color patterns or add a single round of single crochet around the perimeter for a denser edge. Please upload a snapshot of your finished work to your favorite social media site so others can see your color choices. Browse the rest of the site for additional kitchen projects that match this simple, classic aesthetic.